mirror of
https://github.com/MillironX/sc2-sequencing.git
synced 2024-12-22 19:28:18 +00:00
108 lines
3.4 KiB
Markdown
108 lines
3.4 KiB
Markdown
# Illumina
|
|
|
|
## FASTQ Downloader
|
|
|
|
This script downloads all FASTQs associated with a specific Run ID from
|
|
Illumina's Basespace.
|
|
|
|
### Usage
|
|
|
|
To be run in Cygwin
|
|
|
|
```bash
|
|
dl-fastqs.sh
|
|
```
|
|
|
|
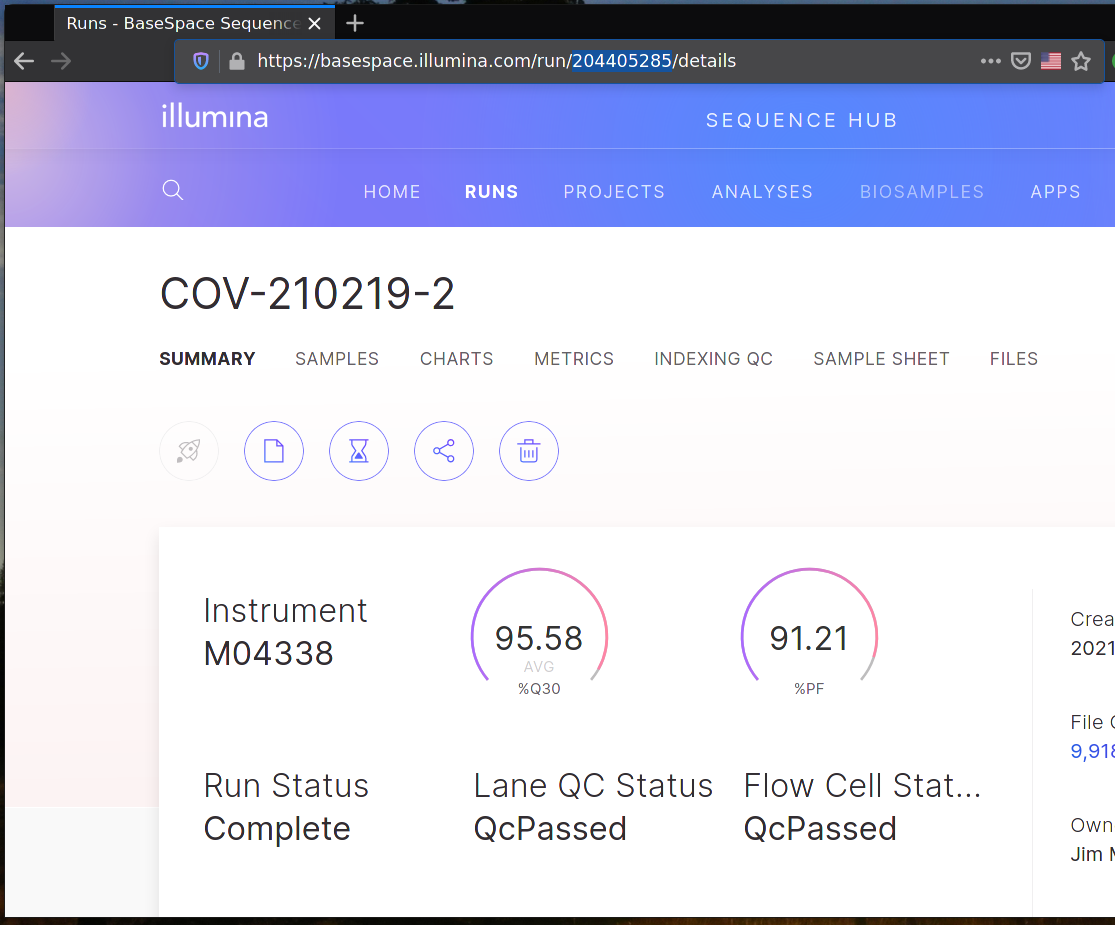
The script will prompt for a Run ID. Copy the Run ID from the URL in Illumina
|
|
Basespace.
|
|
|
|

|
|
|
|
Note that Ctrl+V does not paste in either Cygwin or Windows terminals. Use
|
|
right-click, instead.
|
|
|
|
### Installation
|
|
|
|
This script requires [Cygwin](https://cygwin.com/install.html). The install
|
|
process is complicated thanks to requiring native features of both Windows and
|
|
Cygwin.
|
|
|
|
1. Download and install Cygwin
|
|
1. Select "Just Me" when asked who to install for
|
|
2. Find and add the latest version of the "git" packages
|
|
3. All other default options will work
|
|
2. Press `Win+X`, then `I` to open a new PowerShell window
|
|
3. Run `wget
|
|
'https://api.bintray.com/content/basespace/BaseSpaceCLI-EarlyAccess-BIN/latest/\$latest/amd64-windows/bs.exe?bt_package=latest'
|
|
-O $env:LOCALAPPDATA\Microsoft\WindowsApps\bs.exe`
|
|
4. Close PowerShell
|
|
5. Open Cygwin Console and run
|
|
|
|
```bash
|
|
BS=$(cygpath "C:\Users\\$USER\AppData\Local\Microsoft\WindowsApps\bs.exe")
|
|
$BS auth
|
|
```
|
|
|
|
6. Copy the given link, navigate to it in a browser, and login to Illumina
|
|
Basespace
|
|
7. In Cygwin console now run
|
|
|
|
```bash
|
|
git clone https://github.com/MillironX/sc2-sequencing.git
|
|
cp sc2-sequencing/illumina/dl-fastqs.sh ~
|
|
chmod +x dl-fastqs.sh
|
|
```
|
|
|
|
8. Right-click the Windows desktop, and click "New | Shortcut..."
|
|
9. Type `C:\cygwin64\bin\bash.exe` and click Next
|
|
10. Type `Download Illumina Run` or something else memorable and click "Finish"
|
|
11. Right-click the newly created shortcut and click Properties
|
|
12. In the Target textbox, add a space and `--login dl-fastqs.sh` to the
|
|
existing text
|
|
13. Click OK
|
|
|
|
## FASTQ Sorters
|
|
|
|
These scripts change the file names of the FASTQ files to correspond with the
|
|
well positions during prep phases.
|
|
|
|
### Usage
|
|
|
|
To be run with Julia.
|
|
|
|
```powershell
|
|
julia --project=PATH_TO_ILLUMINA_FOLDER PATH_TO_SORTING_SCRIPT
|
|
```
|
|
|
|
In practice, this looks like
|
|
|
|
```powershell
|
|
julia --project=C:\Users\MillironX\illumina C:\Users\MillironX\illumina\sort-miseq.jl
|
|
```
|
|
|
|
### Installation
|
|
|
|
These scripts require [Julia](https://julialang.org).
|
|
|
|
1. Download and install Julia
|
|
1. Select "Add Julia to PATH" as an option
|
|
2. All other default options will work
|
|
2. Download the Repo's ZIP file (click green button on upper-right)
|
|
3. Press `Win+R`, type `%USERPROFILE%` and press Enter
|
|
4. Copy the illumina folder from the ZIP file into the newly opened folder
|
|
5. Press `Win+X`, then `I` to open a new PowerShell window
|
|
6. Type `julia --project=$env:USERPROFILE\illumina` and press Enter
|
|
7. Press the `]` key, the prompt should change to say `(illumina) pkg>`
|
|
8. Run `instantiate`
|
|
9. Press the backspace key to return to the `julia>` prompt
|
|
10. Run `exit()`
|
|
11. Close PowerShell
|
|
12. Right-click the Windows desktop, and click "New | Shortcut..."
|
|
13. Type `julia --project=%USERPROFILE%\illumina
|
|
%USERPROFILE%\illumina\sort-miseq.jl` and click Next
|
|
14. Type `Sort MiSeq Run` or something else memorable and click "Finish"
|
|
15. Right-click the Windows desktop, and click "New | Shortcut..."
|
|
16. Type `julia --project=%USERPROFILE%\illumina
|
|
%USERPROFILE%\illumina\sort-nextseq.jl` and click Next
|
|
17. Type `Sort NextSeq Run` or something else memorable and click "Finish"
|